Use the Scroll View nodes to create an input plane to enable user input from swiping gestures. For example, you can use the scroll message with its parameters generated by a Scroll View node to move a map plane or rotate a mesh.
When you create a Scroll View node it does not have a visual shape and does not necessarily need visible content, but can instead work as an interactive surface. When a user interacts with a Scroll View node, the action generates a message that travels to the Scroll View node where you can define the behavior for that message. See Tutorial: Rotate a 3D model.
The Scroll View reports changes of its scroll position through the Scroll View: Scrolled message. You can add actions to react to these messages to, for example, set the position of an object according to the scrolling.
Note that Scroll View 3D node has location, position, and size in 3D space. It registers user input in 3D coordinates within the area defined by the size of the Scroll View 3D node. Take this into account when designing interaction with the Scroll View 3D. For example, if you rotate the Scroll View 3D node, the scroll input gets distorted.
Creating a scroll view
To create a scroll view:
In the Projectpress Alt and right-click the node where you want to create a Scroll View node and select either Scroll View 3D, or Scroll View 2D. Note that you can create a 3D node only inside 3D nodes, and 2D node only inside 2D nodes.
In the Project create a node that works as an input plane you want to control with scroll gestures. For example, if you created a Scroll View 3D node, add a Plane, if you created a Scroll View 2D, add an Image.
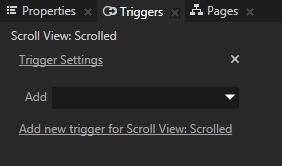
In the Project select the Scroll View, in the Triggers click and in the Add Triggers window add one of the messages from the Scroll View category. For example, select Scroll View: Scrolled.
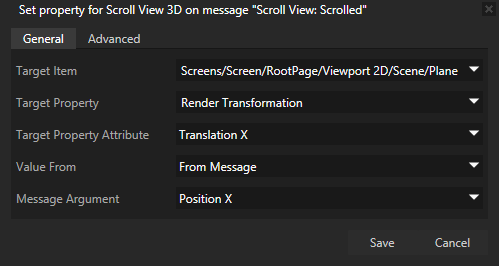
In the Triggers in the Scroll View: Scrolled message click the Add drop-down menu and select one of the actions. For example, select Set Property Value action and set:
Target Item to the object you want to control with the Scroll View node. If you created a Scroll View 3D and a Plane, select that Plane. If you created a Scroll View 2D and an Image, select that Image.
Target Property to the property you want to affect with the Scroll View node. If you created a Scroll View 3D, select Render Transformation. If you created a Scroll View 2D, select Render Transformation.
Target Property Attribute to the attribute you want to control with the Scroll View node. To scroll the object along the x axis, select Translation X.
Value From to From Message
Message to the same axis in the Target Property Attribute For example, if you selected Translation X, select Position X.
Click Save. In the Preview when you click and drag along the x axis within the Scroll View node, the object you set as the Target Item of the Set Property Value action of the Scroll View: Scrolled message moves according to the settings defined by the Scroll View node.
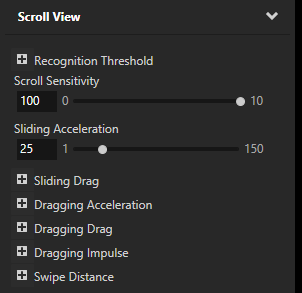
(Optional) In the Project select the Scroll View and in the Properties adjust the threshold, acceleration, drag, and other settings to create a scroll view that responds to user input the way you want it to respond. For example, to make the plane react quicker to user input increase the value of the Scroll Sensitivity property.
Debugging a scroll view
To test whether the scroll view is working properly, add to the scroll view trigger you are using a Write Log action. Every time you use the scroll view, Kanzi Studio writes a message to the Log window.
Setting the background of a Scroll View 2D
Use brushes to set the background of 2D nodes. In Kanzi all 2D nodes by default have transparent background.
To set the background:
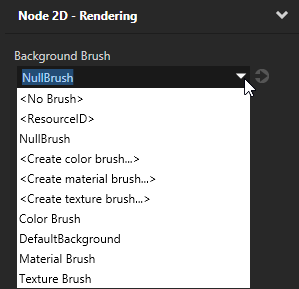
Create a Color Brush, a Texture Brush, or a Material Brush. See Using brushes.
In the Project select the 2D node the background of which you want to paint. Note that you can set only the background of 2D nodes.
In the Properties click , add the Background Brush property, and select the brush you created in the first step.
Scroll view example
This example shows the use of a scroll view as a controller for moving the map plane in a scene. The simplest usage, translating the scroll position coordinates to an object nodes translation attributes is implemented already in the studio project, while more advanced features are created in the program code.
A key aspect in using the scroll view is the controlling of input sensitivity based on the distance of the scroll view plane from the camera. This example uses a one-to-one mapping with the background plane by positioning them at the same distance and orientation from the camera. Scroll view and the background plane, however, are not tied together under the same translation because that way the input coordinate space would move along with the background plane during the user's panning gesture. By positioning the scroll view plane further from the camera, the sensitivity of scroll view gestures increases.
This example demonstrates the use of a raw InterpolatedValue instance in the program code for afflicting a z-offset (zoom) based on the velocity of the movement.
The scroll view as well as the trajectory list box components manipulate input to output coordinates through a value interpolator, effectively allowing for smoother gesture mappings that are often most suitable for touchscreen based interactions.
You can find the example in <KanziWorkspace>/Examples/Scroll_view.
 and in the Add Triggers window add one of the messages from the category.